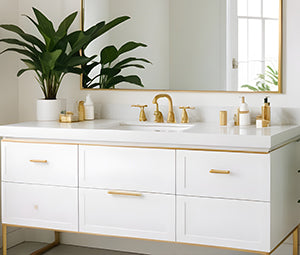
A Quick Guide to Installing a Bathroom Vanity
Vanities are both practical and beautiful, adding extra storage, counter space, and a touch of elegance to your bathroom. If you're planning to replace an old vanity or make the switch from a freestanding sink, check out this basic guide for instructions on how to install your new bathroom vanity quickly and correctly!
Position and Anchor
It's time to install your new vanity! Haul it to the bathroom and position it in place. Make sure it's level—if it's not, shim at the floor until it is. Next, use a pencil or marker to trace an outline of the vanity on the wall and mark the studs. You'll also want to mark the holes for the drain and supply pipes and drill them out. After that, anchor your vanity to the wall using 3-inch drywall screws. Once the vanity is attached and stable, trim the shims with a utility knife and add molding where necessary to fill gaps.
Attach the Top
If your vanity came without a top, you'll need to install your own. Fortunately, installing a countertop is a breeze! Start by spreading caulk over the top of the cabinet. While the caulk is still wet, set the top on the cabinet, slide it into position, and press down. Make sure the top is level and flush with the back wall. Wait for the caulk to dry, check that the top is stable and doesn't shake or budge under pressure, and you're done.
Install the Faucet
Step three in this bathroom vanity installation guide is to install the faucet. After assembling the faucet and drain on the sink, grab the plastic gasket and place it on the faucet. Hold it from beneath to stabilize it and screw on the fastening nuts. Slide the faucet into the holes in the vanity top, then use a wrench to attach the water supply lines to the faucet.
Reconnect the Supply Lines
Now that you have assembled your vanity, you can reconnect the drain and the water supply lines. Once reconnected, turn on the faucet and inspect the vanity for leaks. If nothing looks out-of-the-ordinary, place the pop-up drain in the sink and enjoy using your newly assembled vanity!
Keep in mind that this is a general guide, and installation instructions may vary from product to product. Always cross-check to ensure you install your vanity correctly!
If you plan on adding a vanity to your bathroom but haven’t found the perfect vanity yet, come view Surplus Building Material’s collection of bathroom vanities. We have discount bathroom vanity cabinets and much more! Our surplus stock makes it easy and budget-friendly to get the high-quality pieces you need for your bathroom renovation.


